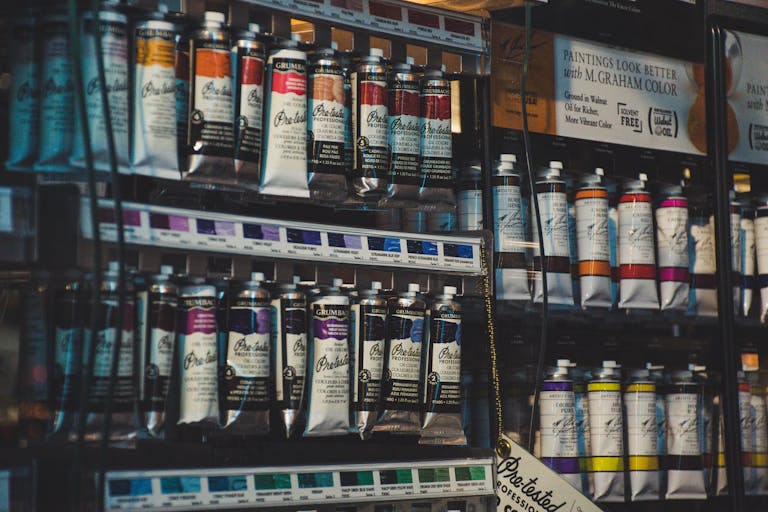
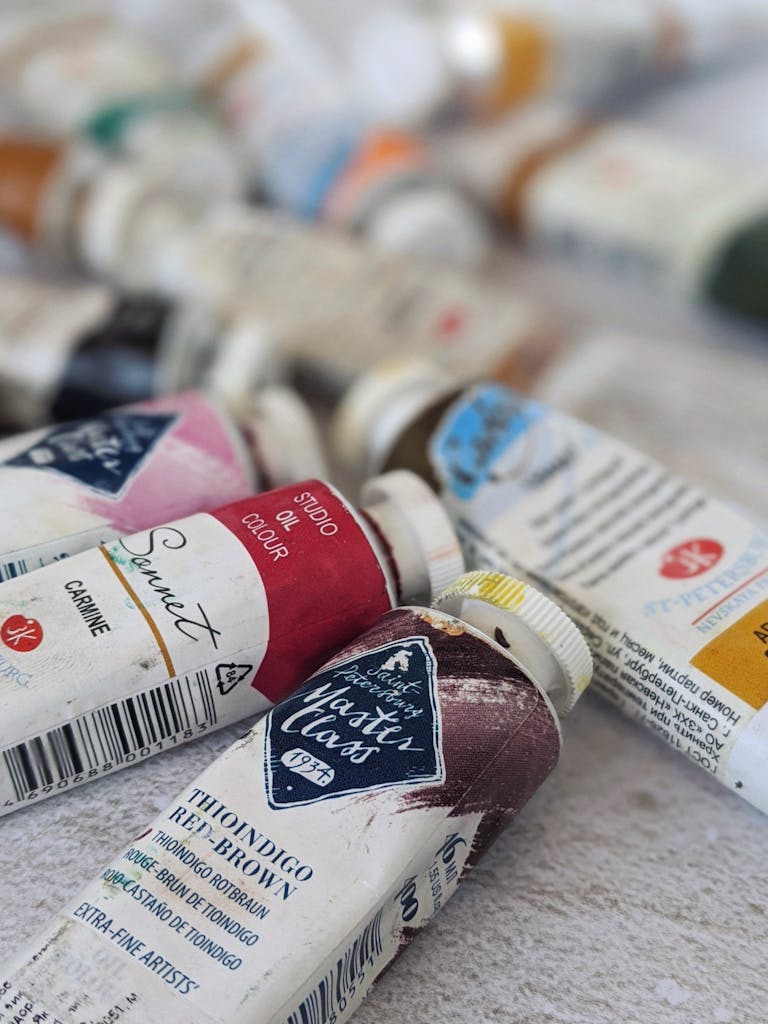
Professional vs Student Grade Oil Paints: A Complete Guide for Beginners
Let me break that down for anyone who wants to learn about oil paints. Think of oil paints like cars – you can get a basic model that gets you around town just fine or a luxury version with all the bells and whistles. Student paints are like that reliable starter car – they’re more affordable and fantastic for learning. Professional paints are like the luxury model – they cost more but give you richer colors and work better.
Here’s the wild thing – a tube of professional paint can cost ten times more than student paint! I’ve used both kinds for years, and I’ll tell you the truth – both have their place. You might wonder which to choose if you’re starting to paint. It’s like cooking – you don’t need fancy chef’s knives when you’re learning to chop vegetables, but you might want better tools as you get better. Let me help you figure out which paint is right for you and your art.

Understanding the Core Differences Between Professional and Student-Grade Oil Paints
Let me share what I’ve learned about oil paints in a way that’s easy to understand. I’ve taught art for years and made many costly mistakes, so I can help you avoid them!
Think about oil paints like cooking ingredients. Professional paints are like high-end ingredients from a fancy store – they have more “flavor” (or in this case, color) packed into each tube. In fact, they can have two or three times more color than student paints! I found this out when my students’ paintings looked pale and chalky next to mine, even though we were using the same colors.
Both kinds of paint use similar basic ingredients to hold the color (usually linseed oil), just like how fancy and regular pasta use flour and water. But, professional paints use better-quality oils that make the paint smoother and last longer. When I paint with professional grades, I can feel how much smoother they spread on the canvas.
Here’s something interesting – professional paint makers take extra steps to make their colors bright and even. It’s like the difference between a smooth, well-mixed cake batter and one with lumps. Student paints might dry at different speeds or feel bumpy when you use them.
The strength of the color is where you really see the difference. Once, we mixed the same blue and white paint in my workshop. The professional paint stayed bright twice as long as the student paint before turning pale. And professional paints won’t fade as quickly over time – I learned this the hard way when a student’s painting lost its yellow colors after just two years.
If you’re starting out, my advice is mix and match! Buy professional paints for the colors you use most (like red, blue, and yellow), and get student paints for those you use less often. Think of it like having a few excellent kitchen knives for important jobs, and cheaper ones for basic tasks.
Professional paints come in more color choices, but don’t worry about that when you’re learning. It’s like cooking – you don’t need twenty different spices to make a good meal. Please start with the basic colors and learn to mix them well.
Remember, even the best paint won’t make you a great artist overnight. I’ve seen beautiful artwork made with student paints and not-so-great paintings made with expensive supplies. What matters most is practice and understanding how to use what you have.

The Price Factor: Breaking Down the Cost-Value Relationship
Let me tell you what I’ve learned about oil paint prices after teaching art for years and making some expensive mistakes along the way. Trust me – your wallet will thank you for learning from my experience!
Remember the first time you saw how much professional oil paints cost? When I saw a $40 price tag on one Cadmium Red tube, I thought there must be a mistake! But here’s something surprising I discovered while teaching: Even though professional paints cost 3-4 times more, they can actually save you money in the long run. Why? Because they’re packed with more color power. One of my students used up a whole tube of student-grade yellow paint on a single painting, while my professional tube lasted through five paintings!
Think of it like coffee – you could buy cheap coffee and need three scoops to make a strong cup, or buy premium coffee and only need one scoop. When my class tested this with blue paint, we had to use three layers of student paint to match just one layer of professional paint. That’s a lot of extra paint!
So here’s my money-saving trick: Buy professional paints for colors you use all the time (like red, blue, and yellow), and get student paints for colors you use less often. It’s like having a few really good kitchen tools for daily use and basic ones for stuff you rarely do.
The way you paint matters, too. If you like to paint with thick, chunky strokes, student paint costs you more because you’ll need so much of it. I watched a student go through three tubes of student white paint in one class – that same work would have only needed one tube of professional paint.
Professional paints also last longer without fading. I’ve seen sad cases where paintings with cheap paint lost their bright colors after hanging in sunny rooms. What costs more – one $40 tube of good paint, or having to redo a whole painting because it faded?
Start by keeping track of which colors you use up fastest – those are the ones worth buying in professional grade. Most of my students do well spending about 60% of their money on professional paints for their most-used colors, and 40% on student paints for everything else.
Just remember – expensive paint won’t make you a better artist overnight. When you’re learning, it’s perfectly fine to use student paints. Sometimes, having to work a bit harder with basic materials teaches you more about painting!

Pigment Quality and Color Range
Let me share what I’ve learned about paint colors and quality after years of teaching art. Trust me – I wish someone had explained this to me when I started!
Picture this: I was teaching my class how to mix green paint (which is tricky!). We used both professional and student paints, and wow – what a difference! The expensive paints made bright, clean greens, while the cheaper ones looked muddy, like when you mix too many colors together. Here’s why: Many student paints use a mix of cheaper colors to copy what one pure, expensive color does in professional paints. Take Cadmium Red – the professional version uses pure cadmium (that’s why it costs so much!), while the student version mixes cheaper materials to look similar.
This really matters when you’re mixing colors. One of my students couldn’t figure out why her greens looked dull and dirty. We discovered her cheap yellow paint was three different colors mixed together! When we switched to a professional yellow paint (made with just one pure color), her greens suddenly looked bright and beautiful.
Think of it like cooking – you can make better food with a few high-quality ingredients than with lots of lower-quality ones. Professional paints also mix together more predictably, like reliable recipes that turn out the same way each time. I keep samples of different paints on my studio wall, and after five years, you can really see how the cheaper ones have faded while the professional ones stay bright.
Here’s my advice for beginners: Start with just a few professional paint colors and really learn how to use them. It’s like learning to cook – better to master a few good ingredients than to have a cabinet full of cheap ones you don’t know how to use. And remember – even the best paint won’t make you a great artist overnight. I’ve seen amazing paintings made with student paints by artists who really understood their materials. It’s all about learning to work with what you have!
Performance Characteristics and Working Properties
Let me tell you what I’ve learned about how different oil paints feel and work when you’re actually painting. After teaching for years, I’m still amazed by how different they can be!
Picture this: I was showing my class the difference between expensive and student paints by painting two canvases side by side. The professional paint spread smoothly, like soft butter on warm bread. But the student paint? It was more like trying to spread cold butter on toast – stiff and streaky!
Here’s something cool I discovered while teaching: When you paint wet-on-wet (adding fresh paint over paint that hasn’t dried), professional paints keep their shape better. Student paints tend to get mushy and mix together too much, like when watercolors bleed into each other. This really matters when you’re trying to make smooth color changes in your painting.
The way paint sits on your canvas is different too. When you make thick, bold brushstrokes with professional paint, they stay put – like peaks of whipped cream that hold their shape. But my students using cheaper paints got frustrated because their bold strokes would collapse into flat puddles. Why? Professional paints have more color packed into them, which helps them keep their shape.
Want to know something interesting about paint drying? Professional paints usually dry at about the same speed, no matter what color you use. But with student paints, some colors might dry in a day while others take a week! Imagine baking cookies and not knowing if they’ll need 10 minutes or 2 hours – pretty tricky, right?
The way paint mixes is different too. Professional paints have a “just right” quality – they mix well without turning muddy. I call this the “Goldilocks zone” when I’m teaching. It’s like having really good ingredients that blend perfectly when you’re cooking.
But remember – even the fanciest paint won’t make you a great artist overnight. It’s like having a professional chef’s knife – it won’t make you a better cook unless you know how to use it. Focus on learning good painting techniques first, and the quality of your paints will matter more as you improve!
Making the Right Choice for Your Needs
Let me share what I’ve learned about choosing the right oil paints after teaching lots of students – and making plenty of mistakes myself!
I used to think buying the most expensive paints would make me a better artist (spoiler: it didn’t!). Now, I help my students make smarter choices. Here’s the thing – it’s not about buying all premium paints or all cheap paints. It’s about being smart with your money and matching your paints to what you actually need.
Think about it like cooking tools. If you’re learning to cook, you don’t need a $200 chef’s knife right away. Same with paint – when you’re starting out, student paints work fine for learning the basics. I once had a student spend $500 on professional paints before she’d even tried oil painting. Two weeks later, she realized she didn’t even like oils!
Here’s my money-saving trick: Buy professional paints for colors you use all the time, and student paints for everything else. Start with professional white paint (you’ll use tons of it!) and your basic red, yellow, and blue. This gives you great quality where it matters most without emptying your wallet.
Your painting style matters too. One of my students loved painting with thick, chunky strokes – she found out professional paints worked much better for that. But another student, who painted in thin layers, did just fine with student paints for most colors.
Here’s a helpful tip: Keep track of which colors you use most. I did this and was shocked to find I was buying expensive paints in colors I barely used! Also, try small tubes first, even of the professional paints. It’s like sampling a new food before buying a lot of it.
Remember – beautiful paintings can be made with any grade of paint. I’ve seen amazing artwork done with student paints and not-so-great paintings done with the most expensive supplies. Focus on learning to paint well, and upgrade your paints as you grow and discover what you really need.
Tips for Transitioning Between Grades
Let me share what I’ve learned about upgrading your oil paints after helping many students figure this out. It’s tricky, but don’t worry – there’s a smart way to do it!
I remember how overwhelming it felt looking at those expensive paints for the first time, holding my wallet tight! But after years of teaching, I’ve figured out how to upgrade without spending too much money all at once.
Here’s the biggest tip I’ve learned: Start by upgrading your white paint! I discovered this the hard way when I was using cheap white paint with expensive colors. Since you mix white into almost everything, using different qualities of paint made my colors act weird. Yes, professional white paint costs more, but it’s worth it because you use so much of it.
Next, upgrade your basic colors – yellow, blue, and red. Think of these like your main cooking ingredients. Once during class, we tested expensive and student paints side by side. When we mixed them to make new colors, the expensive paints made bright, clean colors, while the student paints looked a bit muddy.
Here’s something surprising I learned: Some cheaper paints work just fine! Earth colors (like brown and yellow-brown) often work well even in student grade. Save your money for paints where quality really matters.
A money-saving trick I discovered: Buy professional paints in transparent colors (like deep blues and pinks). They usually cost less than some other professional paints, and a little goes a long way. Plus, they look beautiful when you use them!
Don’t feel like you need to upgrade everything at once. That’s like trying to replace all your kitchen tools in one day – it’s expensive and overwhelming! Instead, keep track of which colors you use most. After a few months, you’ll know exactly which paints are worth upgrading next.
Remember – even the best paint won’t make you a better artist overnight. I always tell my students to practice with student paints first. That way, when you do buy expensive paints, you’ll really notice and appreciate the difference!

Let’s Wrap it Up
Let me wrap this up in a way that makes sense for any artist wondering about which paints to buy.
Here’s the simple truth about oil paints: You don’t have to choose between all expensive or all student paints. Think of it like building a kitchen – maybe you invest in one really good chef’s knife while keeping your other tools basic. Smart artists often use both kinds of paint in their work.
If you’re just starting out, get good student paints. They’re like training wheels – perfect for learning without worrying about wasting expensive materials. Then, as you paint more, slowly buy professional paints for the colors you use most. It’s like upgrading your cooking tools one at a time as you become a better cook.
Remember, there’s no “right” way to build your paint collection. Every artist is different – what works for someone else might not work for you. Trust your own journey and let your painting style and needs guide which paints you buy. The most important thing isn’t having the most expensive paints – it’s knowing how to use what you have!
By Antonio Limongi MFA EdS
Limongi, Owner of Antonio Limongi Fine Art LLC, is a Master Painter, Portrait Artist, and Art Instructor with 20 years of experience. He reports on issues in Fine Art Education, Creating Art, Investing in Art, and Selling Fine Art.